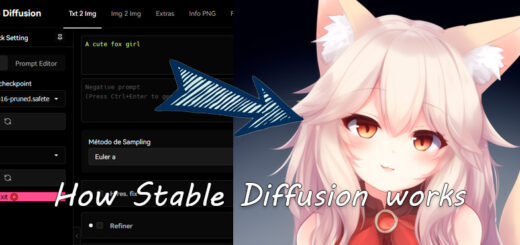
Ollama: Your private and free AI similar to “ChatGPT”
I think that at this point and even more so if you are reading this entry, you know at least the basics of artificial intelligence, more specifically the LLM models or as many people know for being one of the first services to become widely known “ChatGPT”.
These language models using artificial intelligence can not only follow conversations in a completely natural way, but they have become the perfect ally when it comes to carrying out our tasks or requiring help on occasion.
Today I come to talk about Ollama, an open source project that has really caught my attention, since it not only simplifies the use of AI on any platform, but is designed in a completely customizable and extensible way, in addition to working privately and totally free.
What is Ollama?
Ollama is an application capable of loading long language models (LLM) that offers interaction through CLI, but its true potential is its use through API.
By offering an API, the application is basically agnostic, it fulfills its main function and leaves us open a wide range of possibilities, for example it allows us to connect it and use any interface of our choice, but not only that, we can connect it with others LLM projects like LangChain and further expand its potential, but today we are going to focus on the basics and I will leave its different extensions for later.
Furthermore, and also very important, is that by being private and running only on our computers, we can have the confidence of providing the data we want, since this will not be shared with any company or third-party servers.
Ollama Installation
Ollama already makes different installers available to us depending on our platform, today it is already compatible with Windows, Linux and Mac, and supports Nvidia or AMD cards, so in terms of compatibility it is quite complete, it would simply lack support for the Intel ARC.
To install it, we simply go to its official website, press the “Download” button and select the installer corresponding to our operating system. I am not going to make a guide about this because the Ollama team has already taken care of making the simple installation for all types of users.
Ollama file directory change
Well, before starting to work with Ollama, you may be interested in adjusting where it will write all the files, since the models are usually heavy and you may not be interested in having them on your system hard drive, if you only have one disk or you don’t care if it saves everything to the system disk, you can leave the default path and skip this step completely.
To change the directory where Ollama saves its files, we must do it through the environment variable “OLLAMA_MODELS”, in my case I am going to send all the files to my secondary hard drive D:, therefore the value of the variable would be like this:
D:\IAs\ollama\models
Network accessible service
This step is only for those who want to have the Ollama server accessible on the network. If you are going to use it only on the same computer where you run Ollama or you are going to install an interface on it, you can skip this step completely.
Ollama allows us to open its connections beyond our own PC, which allows us to connect different devices to our Ollama server through our local network, to open the connections, we must establish 2 more environment variables.
First of all we need to establish the variable “OLLAMA_HOST” this variable is the one that will indicate which IP addresses our server will listen on, if we have a card dedicated to our LAN we can use its IP, or if we want it to listen on all addresses we have to set it to:
0.0.0.0
The other variable that we must adjust is “OLLAMA_ORIGINS”, this provides a little more security to our server since it enables CORS and denies requests from IPs or URLs that are not in the list.
In my case, I am going to connect and load the interface from the server on my network (192.168.1.100) and the local domain “https://server.home”, so the environment variable should have this value:
http://192.168.1.100,https://server.home
We can add as many as we need simply by separating them with commas and not adding spaces.
Use via CLI
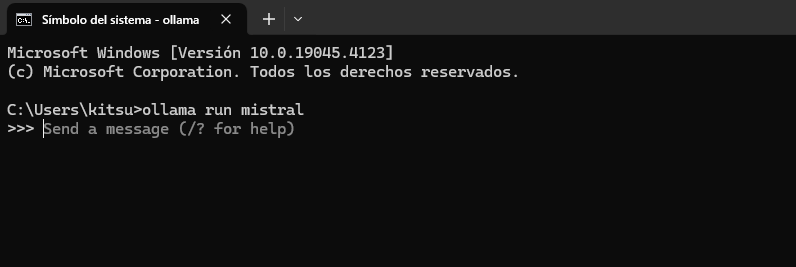
To run Ollama using the command console, we have to specify a model for it.
Ollama makes the best-known models available to us through its library. In this example we are going to use “Mistral7B”, so to run Ollama and download the model we simply have to enter the following command in the console:
ollama run mistral
This download will only be carried out when the models are not previously downloaded. Once they are already downloaded, their start will be much faster. Once it is ready, we will find a screen like this:
Where we can simply interact with the AI by writing what we want, it is important that if we use very long text or several lines of text, we start and end it with three double quotes, example:
"""Necesito crear un titulo optimizado para SEO que incluya las siguientes palabras: ejemplo, ollama, texto, multilinea"""
But this is just a simple use of the application, using it through an API and being able to connect it to an interface is what really interests us, so I’m not going to go much deeper here.
Regarding the resources, don’t worry about them, since Ollama will download the model from memory 5 minutes after the last request by default, obviously the response speed and the models that we can load will depend on the features of the PC.
Use via API
The use through API is really where Olama is going to be most attractive to us, it has a fairly complete API that will allow us to connect it to any interface, be it OpenWebUI, SillyTavern… in addition to being able to make our own integrations, I am going to give an example of a request to generate a response in real time (stream) using Axios:
import Axios from 'axios';

const message = "Necesito crear un titulo optimizado para SEO que incluya las siguientes palabras: ejemplo, ollama, texto, multilinea";
const model = "mistral:latest";

const axios = Axios.create({
  timeout: 0,
});

var request = await axios({
  method: 'POST',
  url: 'http://127.0.0.1:11434/api/generate',
  data: {
    "model": model,
    "prompt": message,
    "stream": true
  },
  responseType: 'stream'
});

const stream = request.data;

stream.on('data', chunk => {
  chunk = chunk.toString()
  console.log(chunk)
});
As you can see, Ollama is really useful, since not only will we be able to connect it with many open source projects, but we can also create any custom script or program that makes use of AI when we require it.
This entry is the introduction to a series of tutorials about Ollama, so I recommend you follow the tag to exploit its full potential and if you like Artificial Intelligence, I have created a category for all posts related to AI.
In the next tutorial, we will see how to install the OpenWebUI web interface that makes it easier for us to use Ollama as well as offering us various extra functions.