Add artificial intelligence to Krita and speed up your drawings
Krita It has always been a good free option as a graphic editor, but thanks to artificial intelligence it has now gained much more prominence, since it allows us to work hand in hand with AI in a comfortable and very fast way thanks to Generative AI for Krita.
This plugin will allow us to generate an image completely from scratch, make small touch-ups or additions as we would do with inpainting or img2img in the traditional Stable Diffusion UI, or even perform advanced control techniques with ControlNet, but without leaving the program. , nor import and export files constantly or using different tools.
As a backend, it uses ComfyUI, if we have it installed, we can use our own installation (I recommend it this way, since we can always use ComfyUI either from its own interface like any other program, maintaining our configuration and our custom nodes), it is the configuration more complex and the one that we are going to use in this guide, but it should be noted that the plugin can also install it within itself automatically or even make use of online services if your PC cannot run the AI.
Installing ComfyUI
This step is only in case you do not have ComfyUI yet, if you have it installed skip this step completely.
To install ComfyUI on our PC (assuming you use Windows) we download the portable installation from this link, make sure you download the first link and not the one in the “Other builds” section.
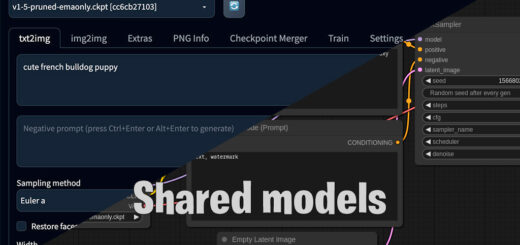
Once downloaded, simply unzip the file and place the folder where you want to leave ComfyUI installed. If you already had automatic1111 or forge installed, you do not need to duplicate your models and parrots, since you can share the models between Stable Diffusion and ComfyUI easily.
It is important to have at least one model, if not, ComfyUI will show an error and will not be able to start, if you have configured the automatic1111 folder you will not have a problem, if not, download at least one model and put it inside the “ComfyUI\models” folder \checkpoints»
We start ComfyUI with the file “run_nvidia_gpu.bat”, once it starts correctly, we are going to close the console again, since we will install a manager in ComfyUI to allow us to easily install nodes.
For this step we need to have Git installed. We open a CMD window, go to the directory where we installed ComfyUI, and execute the following commands:
cd ComfyUI/custom_nodes
git clone https://github.com/ltdrdata/ComfyUI-Manager.git
Once cloned, we start it again, we have already finished with the basic installation of ComfyUI, we can now proceed with the installation and configuration of the plugin.
Installation requirements
For the plugin to work correctly, it is necessary to install some nodes and models in ComfyUI, so let’s get to it.
Nodes for ComfyUI
We start with the nodes, this is the list of the required nodes:
- ControlNet preprocessors: https://github.com/Fannovel16/comfyui_controlnet_aux
- IP-Adapter: https://github.com/cubiq/ComfyUI_IPAdapter_plus
- Ultimate SD Upscale: https://github.com/ssitu/ComfyUI_UltimateSDUpscale
- Inpaint nodes: https://github.com/Acly/comfyui-inpaint-nodes
- External tooling nodes: https://github.com/Acly/comfyui-tooling-nodes
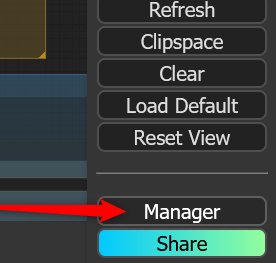
To install the modules, we go to the ComfyUI interface and press the “Manager” button that appears at the bottom left:
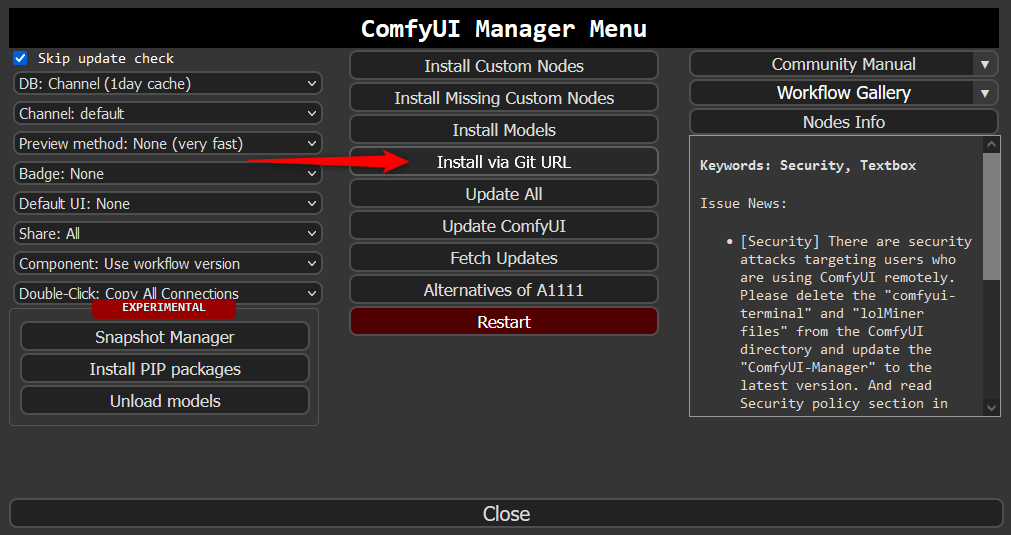
Within the Manager window, we click on the “Install via Git URL” option:
And in the pop-up box that appears, we enter one by one the five URLs that I have listed before:
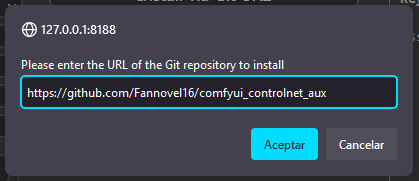
We wait for another pop-up window to confirm that it has been installed correctly and we repeat the installation with the remaining nodes, each time we install one, it will tell us that a restart is necessary, but we don’t really need to restart on each one, we can restart it when everything is installed.
Now let’s go with the models, the first group is necessary, since they are needed regardless of the model you use later (either SD1.5 or XL), the rest we can install only the SD1.5 ones if we are only going to use these models, only the XL or both to be able to use all types of models (I recommend both).
Download each model from the links and place each one inside the ComfyUI models folder, next to each download link I leave the folder where they should be placed.
Required models
- Clip-Vision in
models/clip_vision/SD1.5 - NMKD Superscale SP_178000_G in
models/upscale_models - OmniSR_X2_DIV2K in
models/upscale_models - OmniSR_X3_DIV2K in
models/upscale_models - OmniSR_X4_DIV2K in
models/upscale_models - MAT_Places512_G_fp16 in
models/inpaint
SD 1.5 models
- ControlNet inpaint in
models/controlnet - ControlNet tile in
models/controlnet - IP-Adapter (SD1.5) in
models/ipadapter - Hyper-SD-LoRA (SD1.5) in
models/loras
SD XL models
- IP-Adapter (SDXL) in
models/ipadapter - Hyper-SD-LoRA (SDXL) in
models/loras - Fooocus Inpaint (Head) in
models/inpaint - Fooocus Inpaint (Patch) in
models/inpaint
With this we leave ComfyUI ready to work with Krita, now we can restart ComfyUI so that it loads all the nodes and modules that we have installed.
Installing Generative AI for Krita
I assume that you already have Krita installed, if not, you must obviously install it first, to do this you can download the installer from its official website.
Once we have our Krita ready, we must download the Generative AI for Krita plugin, once we have it, we just have to go to Krita and in the top menu “Tools > Scripts > Import Python plugin from file…” and we select the file we just finished After downloading, once installed, we restart Krita.

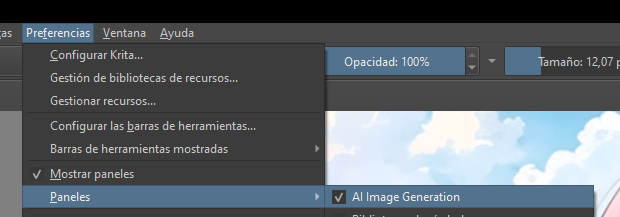
Now, we are going to enable the AI tool, to do this we go to the top menu again and activate the option “Preferences > Panels > AI Image Generation”:
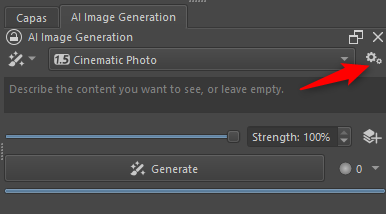
This will enable a new window to manage the AI, we click on the nuts icon and we are going to configure it to work with our ComfyUI:
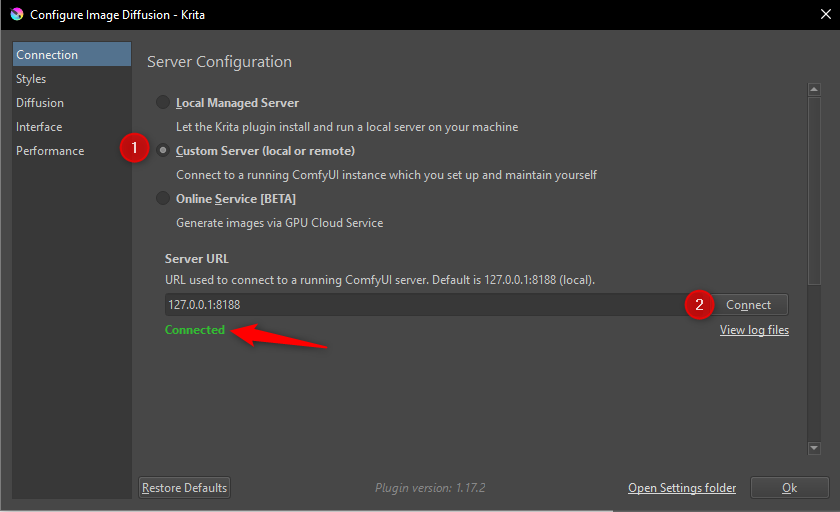
The first thing we are going to configure is the connection with our ComfyUI, within the “Connection” section, we select the second option and click on the “Connect” button. If we have followed the previous steps correctly, we will see a green text that indicates “Connected », if we have made a mistake, it will tell us what requirement we are missing, go back and check that you have downloaded and followed the previous steps correctly.
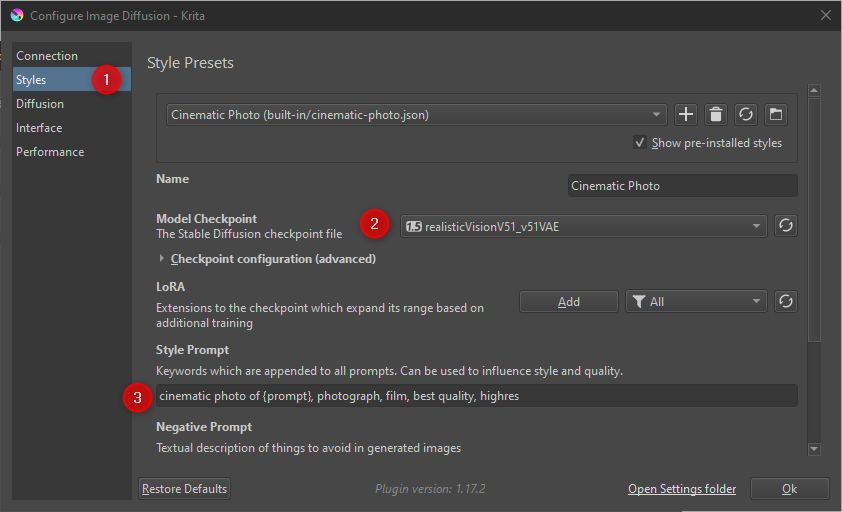
Now we need to configure at least one style with a model that we have installed, to do this we go to the “Styles” section and make sure that at least one of them has a model selected from those that we have installed.
This section is very useful, since it will allow us to create all the styles we need, selecting the model, adjusting the positive and negative prompts and even the sampler parameters.
With this, everything is ready and configured, it is time to learn how we are going to use this powerful set of tools, which is actually easy and intuitive, but I am adding some usage examples so you can start using it.
Using Generative AI for Krita
As I said at the beginning, this plugin performs several different functions, therefore, I am going to explain how to use each of them.
Generate a new image
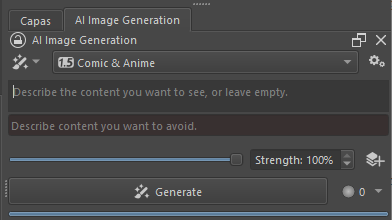
We are going to generate an image completely from scratch, to do this, we create a new file in Krita with the desired size (note that this size will be the one used by the AI to generate the image), once in the new canvas, we go to the window AI Image Generation, we write our prompt and press the “Generate” button.
We wait for the AI to finish its work and present us with the new image it has generated. We can press “Generate” as many times as we want until we obtain the base image we want. Once we obtain the one we want, we select it by clicking on the button with the “Tick” that appears on the image.
Inpainting
We can inpaint our image to edit or add new elements. To do this, we draw on it and select the area we want to redraw.
We adjust the strength below 1 so that the button changes to “Refine”, according to the level of modifications that we want the AI to make (1 being the strongest) and we press the “Refine” button, it will propose several versions of the inpainting, We review them and select the one we like the most by clicking on the tick.
We can also use this option to refine existing elements, for example change colors, perfect the drawing or even have the AI propose other alternatives, just as it does with the cat in the previous example, we simply select the area, propose a prompt and adjust the force.
In this example I use a very high force, since so that the gif does not last long and therefore is of a larger size, it is necessary due to the low quality of my sketch, but always remember to try to detail the draft better, try and adjust the force until it adapts to what is necessary, without having to use such a high value, this way the AI will not be as creative and will better adjust to what we are asking of it.
Fill
Filling is the same as inpainting but without the need to draw anything or for something already drawn to exist, we simply select the area where we want to include the new element and propose a prompt, however, the negative point of this over inpainting is that it does not We have control over what we are generating and it is more likely to obtain more random or negative results.
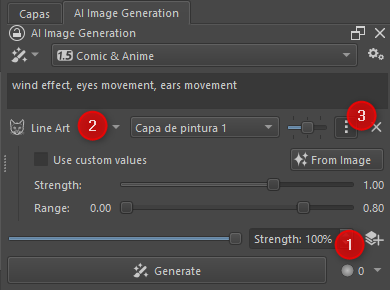
Control layers (ControlNet)
To all the generative results, we can apply any ControlNet action, this will allow us to have much more exhaustive and refined control over what the AI is going to generate, to add a control layer, we simply click on the icon where they appear 3 layers with a “+” symbol.
This will add a control layer to the list, we must select the type of ControlNet model that we are going to use, the layer on which it acts, its properties and its importance.
Right now I am not going to go into details about these control layers, since I have planned an exclusive entry about ControlNet and its different models, I am simply commenting on it in case you already know how to use it, so you know that you can apply ControlNet modifications to the results generated by the plugin.
Extra Features
In addition to the basic generation and inpainting functions, the plugin includes several functions. If we click on the first drop-down button in the plugin window, we can switch between the different panels that the tool includes. I am going to describe each of them. .
Upscale
This is a rescaler for our image, just like we do with “Hi Res Fix” or “Extras > Upscale” in Stable Diffusion, it will allow us to rescale our image to a larger pixel size trying to lose the minimum definition possible.
As in Stable Diffusion, we can select the size, upscale model we want, as well as the force to apply to eliminate pixels and noise when rescaling.

Live mode
The Live mode applies the same generative functions that I presented previously, but with the difference that it is not necessary to press the “Generate” button, this mode will generate what the AI proposes about our changes or the selection we are making.
Although it is useful to learn how to use and visualize, for example, the different force values, when producing images I prefer the generative options using a button, however, we can use this mode in “real time” (which is not 100% since the AI takes time to generate changes) and that the AI acts in “autopilot” mode.
This mode allows us to activate and pause it whenever we want, and it also includes a button to export the results it generates to a new layer.
There is also a button related to animation, however, I have not been able to use animations yet, so I will update the entry with information about animations when I have managed to implement it.
Animation
Unfortunately I have not yet managed to use the animations generated with this plugin, so I cannot offer information for now, as soon as I manage to put it into practice I will update this information. Sorry for the disturbances.
Tips
I leave you a couple of tips that I have discovered during my tests on the plugin that I consider important and are not mentioned or are quite difficult to find.
Use of LoRAs
Although it is not mentioned anywhere, we can make use of our LoRAs in the same way we do in Stable Diffusion (adding , for example ) both in our prompts and in the styles that we configure in the options.
Negative prompts
By default in our AI window we will only have the text area for our positive prompt, however, we can activate the text area for the negative prompt from the plugin options.
To enable it, we go to the nuts icon as we did before, navigate to the “Interface” section and activate the “Negative prompt” option, this way we will have two boxes instead of one in our window, the first being for the prompt positive and the second with a red background for the negative.
Last conclusions
This toolset is very powerful and very well created, from here, all my respect and thanks to the Krita, ComfyUI and Generative AI for Krita teams for their excellent developments, since this toolset provides artists with a comfort and productivity never achieved to date.
I have created this entry exclusively on the same day that I tested it, because I was surprised not only by its good operation and performance, but also by how well it manages to integrate the main (and not so main) functions of the AI in the editor graphic in a way that seems totally native.
I hope this tool helps you improve your workflows and continue researching and practicing with artificial intelligence.